How-to
How to Make a Leather Strop at Home
Published
Short answer
Glue a strip of firm vegetable-tanned leather, about 8 to 10 oz (roughly 1/8 inch, 3 to 4 mm), to a flat board with contact cement. Strops sold for knives have a leather face from 8 x 2 to 12 x 3 inches, so copy one of those sizes. Soft chrome-tanned leather is the wrong material: it gives under the blade and can roll the edge.
A strop is the simplest sharpening tool to build, and most of the questions are about the leather. The board and the glue are easy. What decides if the strop works is how firm the leather is and how flat the base is: a soft or lumpy face rounds the edge the stones just made. This page covers which leather to buy, the sizes makers use, the glue, the steps and the shortcut of using an old belt. If you are not sure a strop is worth building, read what a leather strop does first.
What kind of leather for a strop?
Use vegetable-tanned leather, the firm kind sold for tooling, belts and sheaths. Honey Badger Knives, in its guide to preparing strop leather, recommends vegetable-tanned cowhide for strops used with compound. It rules out chrome-tanned leather, which it describes as much softer and able to roll an edge.
Leather thickness is sold by weight. Tandy Leather's chart puts 1 oz at about 1/64 inch (0.4 mm), 8 to 9 oz at 3.2 to 3.6 mm and 9 to 10 oz at 3.6 to 4.0 mm. So 8 to 10 oz is roughly 1/8 inch, or 3 to 4 mm. Honey Badger suggests 7/9 oz for a compound strop, which is close to the same thing.
| Leather | Use it? | Why |
|---|---|---|
| Vegetable-tanned cowhide, 8 to 10 oz | Yes | Firm and flat. The standard choice for a strop used with compound |
| Vegetable-tanned horsehide | Yes | The Honey Badger guide's author prefers it for stropping bare, without compound |
| Suede or rough side facing up | Yes, with compound | Sharpening Supplies: suede accepts compound better than smooth leather |
| Chrome-tanned leather, the soft kind | No | Much softer, does not firm up when rolled, and can roll the edge |
How big should a strop be? Board and leather sizes
No rule fixes the size, so the safe move is to copy the sizes that are sold. Sharpening Supplies lists its mounted strops with the leather faces in the table. Its two bench strops with a handle carry 3 inches of board beyond the leather: 13 inches overall for a 10 inch face and 15 inches overall for a 12 inch face.
The board has to be flat and stiff, and that is all. Sharpening Supplies mounts its paddle strops on a solid hardwood core, and any flat hardwood offcut does the same job. The pages read for this article give no required thickness: pick a piece that does not flex. For the leather, Honey Badger notes that a 12 x 12 inch square makes 3 to 4 bench strops.
| Leather face | Overall board length | Suits |
|---|---|---|
| 8 x 2 inches | 8 inches, no handle | Pocket knives. Matches a standard 8 x 2 inch stone, so it fits a stone holder |
| 8 x 3 inches | Not stated | Kitchen knives where bench space is short |
| 10 x 2 inches | 13 inches with handle | Pocket knives and smaller kitchen knives |
| 12 x 3 inches | 15 inches with handle | Chef knives: a longer stroke on a wide face |
Which glue holds leather to wood?
Contact cement. Honey Badger's method uses ordinary contact cement in a thin layer on both surfaces: the rough side of the leather and the top of the board. Both are left to dry for 15 to 20 minutes, then pressed together and rolled to set the bond. Contact cement grabs as soon as the two coated faces touch, so line the strip up before it lands. Check the can as well, because drying times differ between products.
Note.Keep the glue layer thin and even. A ridge of glue under the leather shows up as a bump on the stropping face, and a bump puts all the pressure on one spot of the edge.
How to make a leather strop: the steps
The build is one short session plus drying time. Step 3 is optional and adds 2 to 3 days. The example uses the 10 x 2 inch face.
- 1
Cut the board to 13 x 2 inches: a 10 inch face plus a 3 inch handle. Sand or plane the top face flat, check it with a straight edge and wipe off the dust.
- 2
Cut a strip of leather a little larger than 10 x 2 inches with a sharp knife against a straight edge. It is trimmed flush after gluing.
- 3
Optional, to firm the leather (Honey Badger's method): wet both sides for a few seconds, let it dry for 1 to 2 hours, then roll it hard with a rolling pin for 15 to 30 minutes. Let it dry for 2 to 3 days before gluing.
- 4
Spread a thin layer of contact cement on the rough side of the leather and on the top of the board. Leave both to dry for 15 to 20 minutes, or for as long as the can says.
- 5
Line up one end, lower the leather onto the board and press it down. Roll firmly over the whole face with a rolling pin to set the bond.
- 6
Trim the overhanging leather flush with the board, running a sharp blade along the edge of the wood.
- 7
If you use compound, rub the bar over the leather like a crayon and spread it with the heel of your hand. A thin, even layer is enough.
Smooth side up or rough side up?
The steps above glue the rough side down and leave the smooth side up. That is Honey Badger's choice, and it is also the side Work Sharp loads with its emulsion. The other way round works too: Sharpening Supplies puts compound on the suede side because it accepts compound better, and keeps the smooth side plain. For a double-sided paddle, glue one strip each way on the two faces of the board.
The trade-offs are in smooth or rough side. Which compound to load, and how fine each one is, is in what grit is a leather strop.
How to make a leather strop from a belt
An old belt can work if it passes three checks. It must be one solid layer of leather, not two thin layers stitched around a filler. It must be firm: a soft, floppy belt is likely to be chrome-tanned, with the problem described above. And the face you strop on should be bare leather. If the outside has a glossy finish, use the rough inner face and load it with compound.
Cut a straight section without holes, 8 to 12 inches long, and glue it to a board cut to the width of the belt, following the same steps. Most belts are narrower than a 2 inch strop face, so a belt strop suits pocket knives better than a chef knife. Mount it on a board instead of hanging it from a hook: a strap that sags under the blade wraps around the edge.
How to tell the strop is ready to use
Run three checks before the first knife touches it. The leather is stuck down everywhere: press along all four edges and the corners, and nothing lifts. The face is flat: a straight edge laid along and across the leather shows no bump and no hollow. The leather is firm: it does not feel spongy under a thumb. A lifted corner catches the edge of the knife, and a soft spot lets the leather wrap around it.
Then strop spine first with the weight of the knife only, as shown in how to use a leather strop. Ready-made paddle and bench strops are compared in the strop guide.
Quick answers
Short answers on the leather and the build. The figures come from the sources listed at the foot of the page, not from one fixed standard.
- What kind of leather for a strop? Firm vegetable-tanned leather, about 8 to 10 oz, which is roughly 1/8 inch or 3 to 4 mm thick.
- Can you use any leather for a strop? No. Soft chrome-tanned leather gives under the blade and can roll the edge. Use firm vegetable-tanned leather.
- What is the best leather for stropping? Vegetable-tanned cowhide is the standard choice with compound. One guide prefers vegetable-tanned horsehide for stropping bare.
- What glue do you use to make a leather strop? Contact cement, in a thin layer on the leather and the board, dried 15 to 20 minutes before the two are pressed together.
- Can you make a leather strop from a belt? Yes, if the belt is one solid layer of firm leather. Glue a straight section without holes to a flat board.
What you need for this
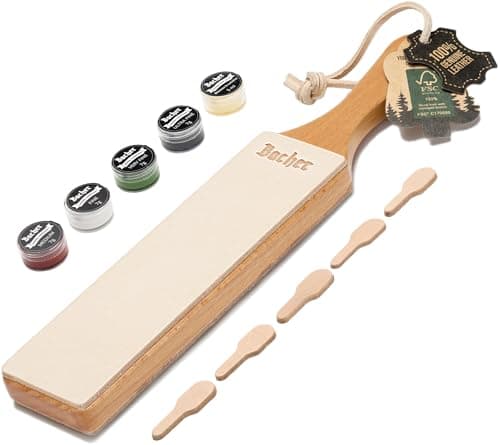 See price on AmazonAmazon
Bacher double sided strop kit, 12.6 in, 4 compounds
From Best Leather Strop for Knives: Paddle, Bench and Double Sided
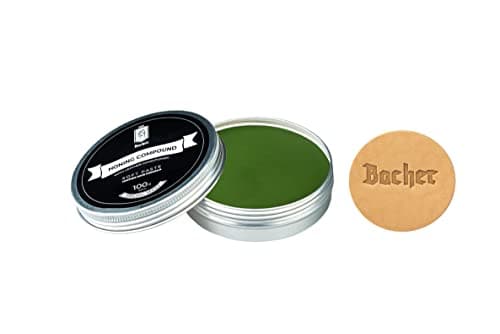 See price on AmazonAmazon
Bacher green honing paste, 8000, 3.53 oz tin
From Best Leather Strop Compound: Green Bars, Pastes and Diamond Emulsion